
I decided to take a break from the OWASP walkthroughs and guides — just making sure that I have my ducks in a row with the remainder of the top 10 — and am doing a walkthrough of a beginner level CTF on TryHackMe called Simple CTF. And it is just that: an easy CTF that also happens to be chock-full of concepts that can be used elsewhere.
If you are a beginner or still getting your feet underneath you, this room’s objectives walk you through the standard steps you should do each time you are pentesting:
- Recon: Some resources will divide this first step into two steps: recon and scanning. For simplicity sake here, both of those are brought under the recon umbrella. This phase involves going to the target website, poking around, getting a lay of the land. You should look for any input fields, look through the cookies and session IDs, see if there are directories. Besides looking through the web site itself, this is also the time to run an nmap scan on the target IP and a directory search using such tools as Gobuster. The goal is to find as much information on the target as possible while keeping an eye out for potential vulnerabilities. The more you practice, the easier it will be to see the worthwhile vulnerabilities.
- Gain Access: Once you have all of your information on the target machine, you are going to want to try to gain access. Gaining access involves attempting to find vulnerabilities in the site and then starting the exploit process to get into the site. In this phase, websites like exploit-db.com come in handy. You can use the site to find exploits for vulnerabilities; these exploits can be in the form of injections, scripts, and other bugs and you will often use tools like Metasploit to utilize the exploit.
- Escalating Privileges and Maintaining Access: If the exploit works correctly and everything else is set, you will often have to escalate privileges in the system. More often than not, you as pentester or an attacker will gain access to the system through a user who doesn’t have many privileges. You will need to find a way to escalate your privileges steadily until you get to the holy grail: root. Once you have it, you need to maintain access, and the pros in this game will maintain access like ghosts: always remaining in the system without attracting any notice.
- Clean up: This final phase involves a couple of steps mixed up in one. Not only should you as pentester make sure that no one can follow your steps as you are still in the system, but you should do your best to make sure the evidence is cleaned up as you leave. Attackers will do this as well. Therefore if you are blue teaming, there are steps that can you can take — particularly through examination of Windows events — to see if an unauthorized user is in your system.
So we can start by grouping the first four questions together under the first phase and will tackle that now.
Questions 1-4: Recon
Question 1: How many services are running under port 1000?
As with other first steps in a CTF scenario, start with a good ole nmap scan:
nmap -sV -sC <machine IP>
Starting Nmap 7.91 ( https://nmap.org ) at 2021-03-24 5:32 EDT
Nmap scan report for <Machine IP>
Host is up (0.14s latency).
Not shown: 997 filtered ports
        PORT        STATE    SERVICE    VERSION
        21/tcp       open     ftp              vsftpd 3.0.3
        |  ftp-anon:  Anonymous FTP login allowed (FTP code 230)
        |  ftp-syst:
		|   STAT:
		| FTP server status:
		|      Connected to ::ffff:10.6.0.104
		|      Logged in as ftp
		|      TYPE: ASCII
		|      No session bandwidth limit
		|      Session timeout in seconds is 300
		|      Control connection is plain text
		|      Data connections will be plain text
		|      At session startup, client count was 3
		|      vsFTPd 3.0.3 - secure, fast, stable
		|_End of status
		80/tcp   open  http    Apache httpd 2.4.18 ((Ubuntu))
		| http-robots.txt: 2 disallowed entries
		|_/ /openemr-5_0_1_3
		|_http-server-header: Apache/2.4.18 (Ubuntu)
		|_http-title: Apache2 Ubuntu Default Page: It works
		2222/tcp open  ssh     OpenSSH 7.2p2 Ubuntu 4ubuntu2.8 (Ubuntu Linux; protocol 2.0)
		| ssh-hostkey:
		|   2048 29:42:69:14:9e:ca:d9:17:98:8c:27:72:3a:cd:a9:23 (RSA)
		|   256 9b:d1:65:07:51:08:00:61:98:de:95:ed:3a:e3:81:1c (ECDSA)
		|_  256 12:65:1b:61:cf:4d:e5:75:fe:f4:e8:d4:6e:10:2a:f6 (ED25519)
		Service Info: OSs: Unix, Linux; CPE: cpe:/o:linux:linux_kernel

		Service detection performed. Please report any incorrect results at https://nmap.org/submit/ .
		Nmap done: 1 IP address (1 host up) scanned in 52.28 seconds
You should be able to see your answer to question number 1 by going through those results.
Question 2: What is running on the higher port?
Look back to the nmap results above. Some of the ports are below 1000. Only one of the ones listed is above 1000: 2222, which is the port used for ssh.
Question 3: What’s the CVE you’re using against the application?
The information we have so far is that there are three total ports open. Beyond that: bupkis. We need more information. We need more recon.
As I detailed in the introduction, nmap and poking around the web site are not the only tools available to you. Another extremely useful tool for recon is Gobuster.
Gobuster, is like the more commonly known DIRB, but faster. The DIRB package, according to the Kali Linux documentation, is a “scanner that looks for existing or hidden web objects” by “launching a dictionary attack against a web server and analyzing the response.” So it’s dirb — it finds objects that can be found with a bit of poking around online as well as objects that are hidden by using wordlists included with Kali Linux against the site — but quicker because its more efficient. It’s a tool worth having in your arsenal.
But enough description: here’s the command you can use:
gobuster dir -u http://<machine ip>/ -w /usr/share/wordlists/dirb/common.txt

		===============================================================
		Gobuster v3.0.1
		by OJ Reeves (@TheColonial) & Christian Mehlmauer (@_FireFart_)
		===============================================================
		[+] Url:            http://10.10.125.111/
		[+] Threads:        10
		[+] Wordlist:       /usr/share/wordlists/dirb/common.txt
		[+] Status codes:   200,204,301,302,307,401,403
		[+] User Agent:     gobuster/3.0.1
		[+] Timeout:        10s
		===============================================================
		2021/03/24 05:45:21 Starting gobuster
		===============================================================
		/.hta (Status: 403)
		/.htpasswd (Status: 403)
		/.htaccess (Status: 403)
		/index.html (Status: 200)
		/robots.txt (Status: 200)
		/server-status (Status: 403)
		/simple (Status: 301)
		===============================================================
		2021/03/24 05:46:12 Finished
		===============================================================
Before we move on, a bit of explaining is in order. First the command itself: you obviously call the tool with “gobuster.” “dir,” on the other hand, is one of three main modes that gobuster can work in to find web objects:
- dir: this is the mode you’re most likely going to use whenever you use gobuster. It is just a brute force method where gobuster uses the wordlist against the IP to find directories.
- dns: this mode should be used when you want to use gobuster’s brute force methodology against DNS subdomains.
- vhost: here, gobuster is being used to brute force a virtual host.
-u is the gobuster option for inclusion of a target URL or Domain in string format (here: http://<machine ip>).
Following the target IP, we provide the wordlist, starting with inclusion of the “-w” option, which is a string that provides a path to the wordlist. Here that path is /usr/share/wordlists/dirb/wordlist.txt (though you should check your system for the right path).
What about the results? Those directories gobuster returned are interesting as well:
- First, we are going to group the first three together because they work together:
- ./hta: .hta file. An .hta file is a program that can be run from an HTML document. It literally is a shortened form of “HTML Application” and is generally composed of HTML and a scripting language, such as VBScript and JScript. While it isn’t really used here, you should note that hta files can be abused.
- ./htpasswd: this is typically used to protect a file, folder, or site with a password using HTTP authentication and implemented using HTTP authentication and implemented using rules with a .htaccess file.
- ./htaccess: this provides a high-level configuration of a website. Particularly on servers that run Apache, the .htaccess file allows you to make changes to your website’s configuration without having to edit server configuration files.
- ./index.html: This is just a common name given to the default page for websites. Default pages are the pages a site will direct you to when you request the webpage, but do not specify a particular page within that site.
- /robots.txt: robots.txt files tell search engine crawlers (like those used by Google to map the internet) which pages or files the crawler can or can’t request from the site.
- /server-status: exactly what it says, providing the overall status of your web server.
That last one though…/simple is not something you see on every site. Because of that we should pin that on the end of the IP provided (<machine ip>/simple) and go there.
And what do we get? A web page detailing the use of software called a CMS Made Simple.
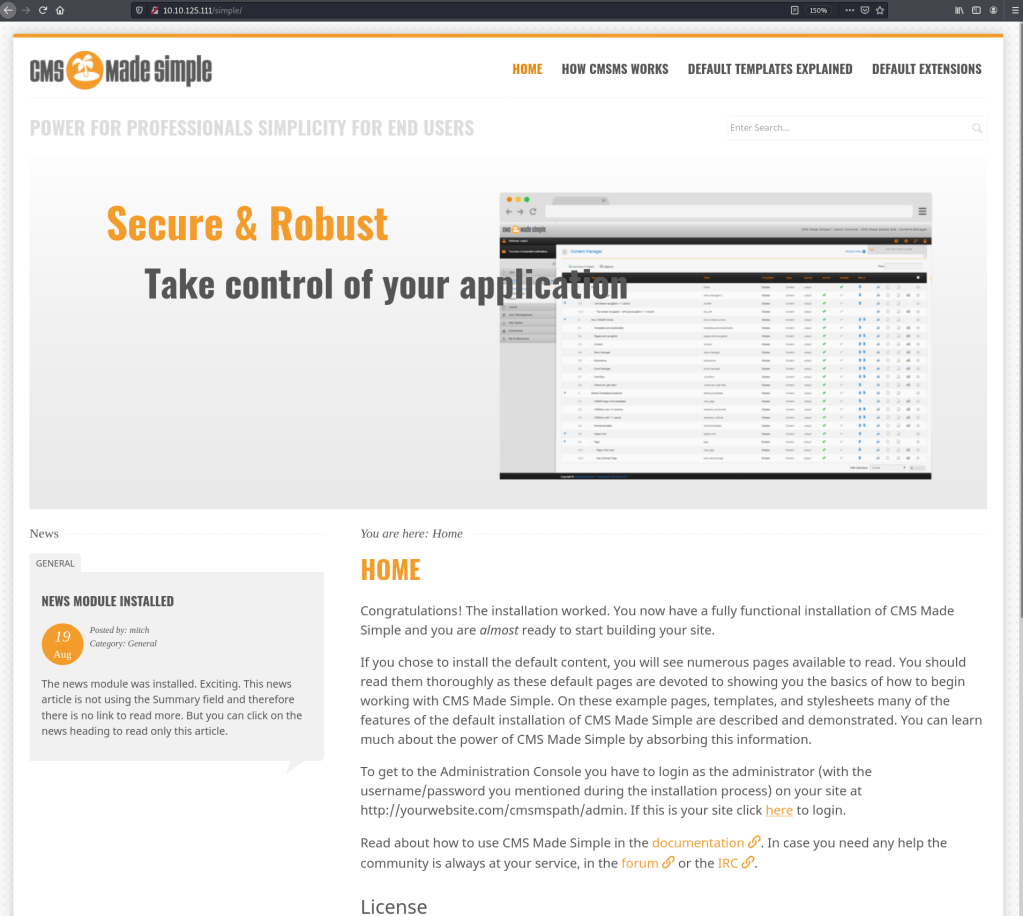
What is a “CMS”? A CMS, according to Kinsta, is a “Content Management System,” which is software that “helps users create, manage, and modify content on a website without the need for specialized technical knowledge.” In other words, CMSs are used by people who want to set up a website but have no clue on how to do it.
This website is using a CMS called “CMS Made Simple.” According to the site, CMS Made Simple 2.2.8 is being used by this site. Are there any vulnerabilities for this?
You betcha. After searching the Mitre CVE database for CMS, I found CVE-2019-9053, a SQL injection vulnerability for CMS Made Simple 2.2.8. That also means that I found the answers to the next two questions.
Questions 5-8: Gaining Access
We now move on to gaining access. Go to exploit-db and download the exploit. Once it is downloaded, run it with the following command:
python exploit.py -u http://<machine ip>/simple/ --crack -w /usr/share/
        wordlists/best110.txt
        [+] Salt for password found: [salt given]
        [+] Username found: [username given]
        [+] Email found: [email given]
        [+] Password found: [password hash given]
        [+] Password cracked: [password]
Noice! So what next? Remember during your recon when you can across three ports? Well one of those was SSH, and I’d be willing to bet that the information you just got from the exploit will work in ssh:
ssh username@<machine ip>
username password: <enter password given>
And you should be in! Once you’re in, run a quick ls -la to view the files. One will be user.txt. Cat into user.txt et voila, flag number 1. That’s also answers to questions 5-7.
Question 8 asks whether there are any other users in the home directory. You can find the answer to that question by running:
ls -l /home
total 8
drwxr-x---    3    <username>    <username>    4096    aug 19    2019    <username>
drwxr-x---    16  <answer>         <answer>         4096    aug 19    2019    <answer>
You should see the answer where I marked <answer> above.
Questions 9 & 10: Privilege Escalation
Now that you are in to the the other computer, you are going to want to see what privileges you have (in order to see what directories and other data you can access or change).
A lesson that I have picked up through practice is to pay attention to the details. Here, when you get into the user’s system, you will have accessed a shell. Compare this shell to the Bash shell you used to enter commands on your own computer: do you notice anything? Suggestions! Bash shells by default — if they are up to date — have the option to press the TAB button to complete a command as long as that command was given previously. When that option is not present, it means either that the shell is out-of-date (which means there are vulnerabilities that you can exploit) or the user is using a custom shell. In either case you can run
/bin/bash
which will take you to the default shell. In other words, you just got access to a real shell that is stable. Shell stability is an important item to keep an eye on: anything loss of connection between your computer and the target will cause you to lose the shell and force you to start the process all over again. There are numerous python scripts online you can run to stabilize the shells.
Nonetheless, now that you have access to the target computer’s shell, you can see what sudo access your user has with the following command:
sudo -l
User <username> may run the following commands on Machine:
        (root) NOPASSWD: /usr/bin/vim
Glory, glory halleluiah, the user has sudo privileges with no password required and I can hear the church bells ringing. And what does he have sudo access to with no password required? Vim. VIM!
Vim — some are oddly obsessed with it, most others absolutely hate it (I mean, who wants to learn new keystrokes just to successfully add a new line of code??). But what you need to know is that Vim (besides being the answer to question number 9) can be used as a shell. And since the user has root access to Vim with no password, we can open up a root shell in Vim.
First, after finding out the root privileges, enter:
sudo vim
Then go ahead and type “:shell” and press Enter. Look at you go!
Now that we are root, let’s see what’s here. Start with the traditional ls -la, and what should you find? /root. Huh. What’s in there? root.txt. Get outta town! Type cat root.txt and get your second flag you superstar.
Conclusion
The reason that I took a break from the OWASP challenges is because I felt this CTF is a great way to understand the motions you need to go through for a successful CTF/pentest. Good luck!
